
The following post is a guest post by my cousin, Erica, who does it all and that includes raising two daughters, making movies, and hand-making holiday gifts for her children and her cousin's children and writing posts about hand-making holiday gifts for children. Thanks, Erica!
My darling cousin, Rebecca, asked me to write this guest post last year and it has taken me almost a year to actually sit down and write it. I want to start by saying that I am not at all a seamstress. I was Creative Director/Co-Founder of a Women’s RTW clothing line for over 5 years and never once sewed a stitch of fabric. Not only did I not think I had the skillset to sew, I was completely uninterested in learning—the irony being that only months after I left the company last year, I started feeling the desire to create with my hands again and a sewing machine seemed like a good vehicle to do so. After taking a summer off with my two young girls, I was craving a creative outlet beyond the kitchen and I jumped into sewing to fulfill that desire. If nothing else, I hope this post may inspire your creativity to just CREATE something fun for your little ones or (even better) for yourself!
I never took a sewing class—I just put fabric together and started sewing, though my ignorance did garner me an embarrassing moment in the fabric shop when I asked to buy bobbin thread (in attempt to replace all of the bobbin thread I used from my friend’s machine). For those of you who are like I was last year, a bobbin is the spool that holds the thread that comes up from the bottom of the machine. One should just thread the bobbin with the thread he/she is sewing with. At the time, I just sewed along and when the bobbin thread ran out, I simply replaced it with another threaded bobbin (no matter the color) that was already full in my friend’s sewing kit. I had a good laugh at the time (and so did everyone else in the store)—especially since I was intimately involved in the garment construction world. But I guess there are some things I never had to discuss with my sewers—and bobbin thread was one of them! Live and learn.
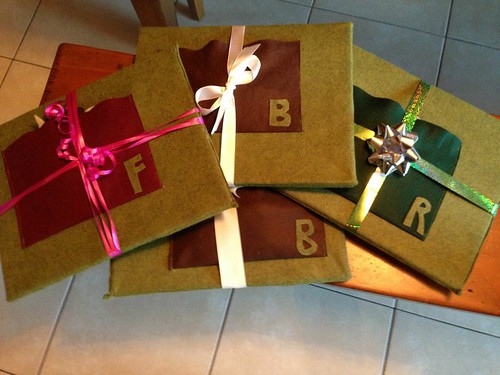
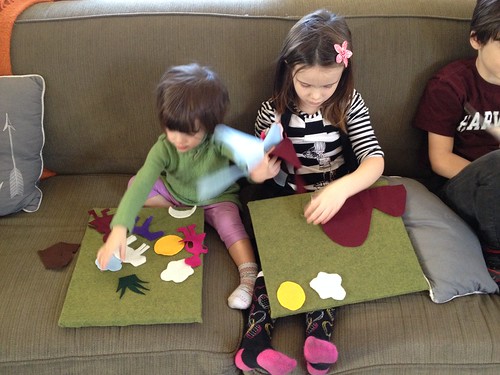
Armed with my newfound knowledge, and the desire to create something crafty and economical for Christmas, I decided to make felt boards for my kids, nieces, cousins and little friends. I saw a great felt board on a wall of a museum in Berkeley and it triggered my fond memory of a felt board that my mother made for my sister and me when we were little. It was just a board with little felt cutouts that illustrated a story. The story she made was inspired by the book, “Are you my Mother?” A little boy walked through different landscapes searching for his mother. He asked a cow, a frog, a goat, “Are you my mother?” and all of them said “no.” Until finally he came to a house and found a woman and he asked her and she replied “yes.” I have very fond memories of my mother telling me the story and carefully laying out each little piece of felt for every “page” of the story. A felt board is a perfect toy for little ones from ages 2-7 (and maybe older, depending on what the felt pieces are).

Revi and Fable, storyelling earlier this year
There are many ways to make a felt board and a lot of the boards are made to be hung on the wall. I wanted the board to be mobile for long car trips and have the ability to be played anywhere, but feel free to modify to your taste—there’s plenty of room for alterations. The clever design of this particular board came from my Mother-in-Law, Kathi Tanamachi—my Craft Guru and constant inspiration for creative kids projects. Her sewing and craft skills are masterful and I am forever in awe of her talent. She came up with the brilliant idea of the pocket in the back to hold all of the pieces. I was seriously thinking about just pinning a plastic bag to the board. (Gasp! The craft gods would burn me at the stake! Thank god for my Guru!)
Materials
For each felt board you will need:
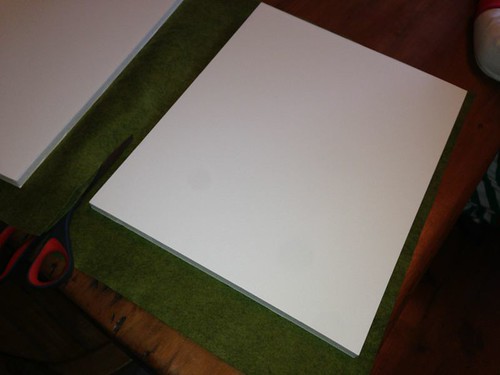
12x15 inch foam board (1/2 inch thick)
Superior Quality Felt
Scissors
Sewing Machine
Glue Gun
CREATIVITY
1. Cut two pieces of felt into 13 ½’ x18’ inch pieces.
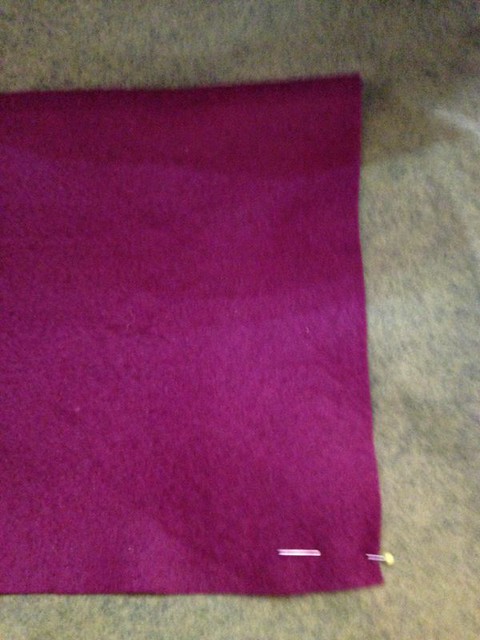
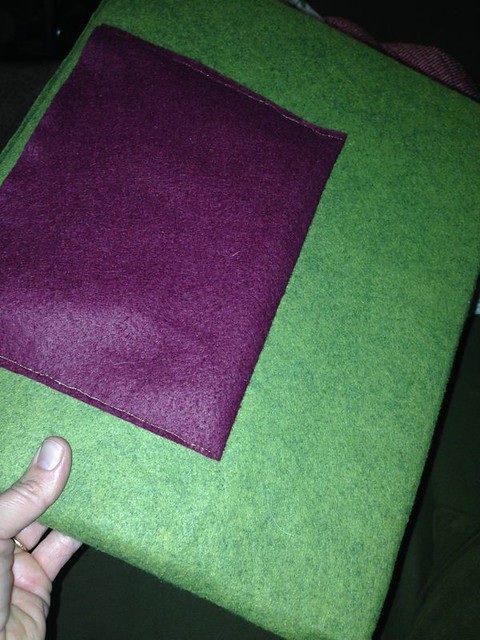
2. Cut a piece of felt in a contrasting color 8”x6” to make the pocket. Orient felt in landscape position and center the pocket (also in landscape position) onto one of the felt pieces. Pin the two short sides and one long side, leaving the top open. Top stitch in place.
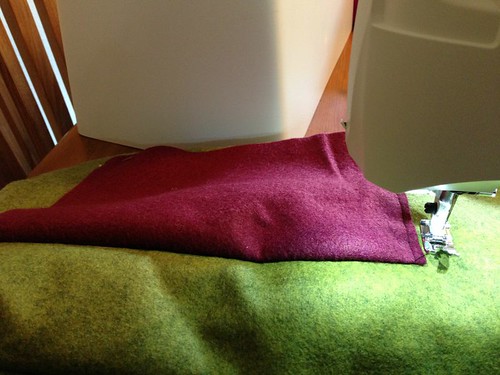
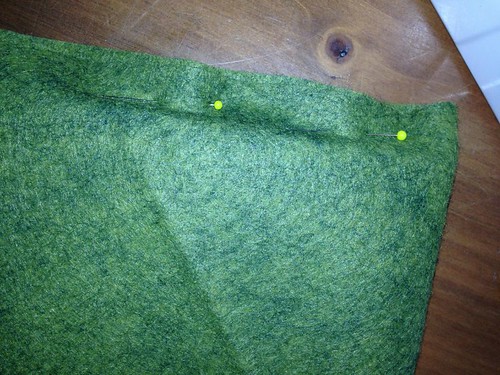
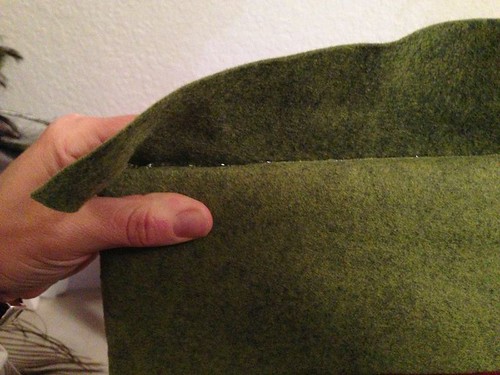
3. With wrong sides together (pocket inside), pin felt on three sides, leaving one short side open. Starting down 2 ½ inches on one of the long sides, sew felt together with ½ inch seam allowance, ending on the other long side 2 ½ inches before the end. The extra material on the short side should NOT be sewn together. Trim seams to ¼ inch.
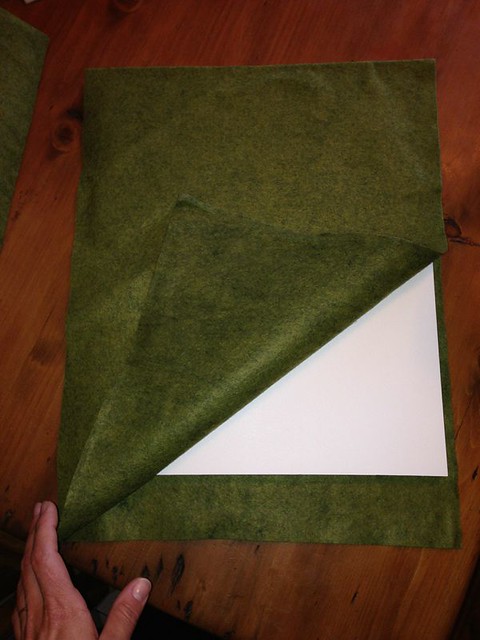
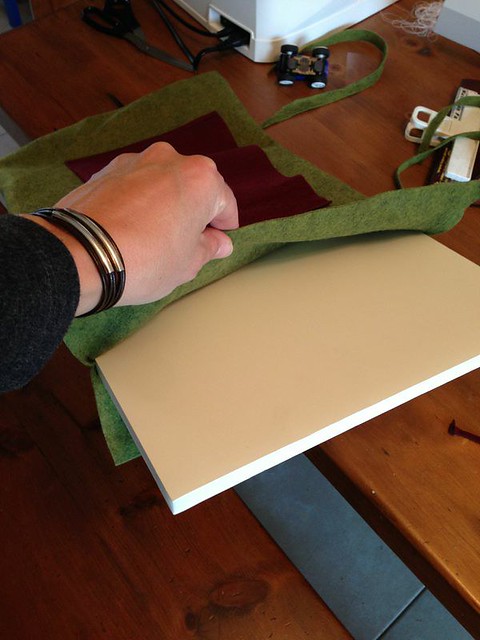
4. Turn right side out. Squeeze the board inside the cover.
5. Glue with hot glue the open edge of the foam board and fold the fabric on the pocket side snugly around the edge of the foam and inside the top felt. Tightly pull the other piece over and glue in place on the end.
6. Once secured, cut any extra fabric from the end and marvel at your beautiful work!
NOTE: If you don’t sew you can do the whole thing with a glue gun!
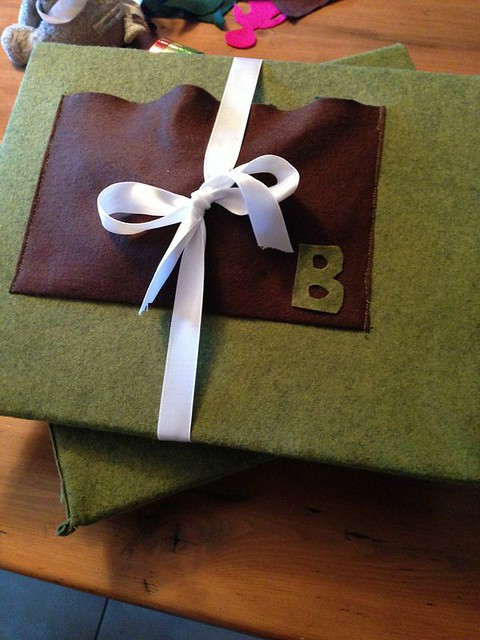
Extra credit! I realized after making so many—especially for multiple children in one house—they needed to be personalized. So, I simply cut out the first letter of their name in a contrasting color and either sewed or hot glued it onto the pocket.
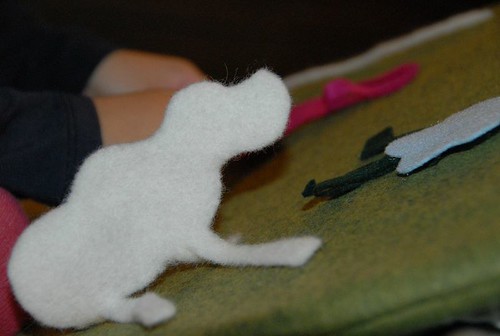
Once the board is complete, you can cut out any shapes freehand to make the story for the child. I am a terrible illustrator, but I just went with it and cut freely and had fun with it! Here are some examples for a story:
1. Tree
2. Cloud
3. Moon
4. Sun
5. Fence
6. Horse
7. Lamb
8. Baby boy or girl
9. Young child
10. Mama
11. Papa
12. House
(Is that a sheep? My eldest, Jade didn’t seem to question.)
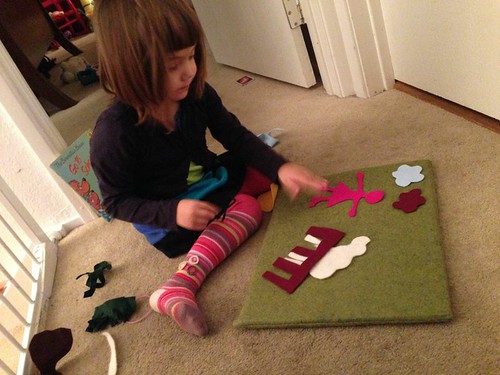
I found, for the younger children, they like a little guidance when you present the story to them, and then they take it from there with their big imaginations! Or, you can make it like an interactive book and tell them the story while they put the pieces on it. I recently made one for my 2 year old who is obsessed with babies. So, I cut out a bunch of baby-themed felt pieces (baby, stroller, crib, bottle, etc.) for her to play with.
For an older child who can read, you can write the story out for them to read while they use the characters to play out the story. So many creative ways to play with this simple concept! I look forward to hearing your ideas/thoughts. Once you get into sewing, it is such a fun and inexpensive way to give really meaningful gifts that will last.
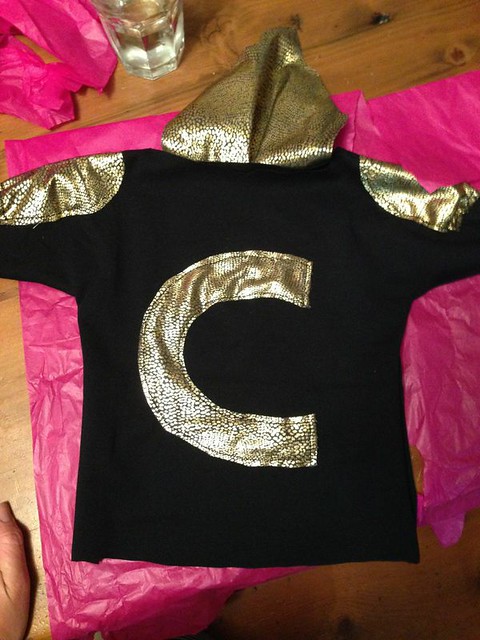
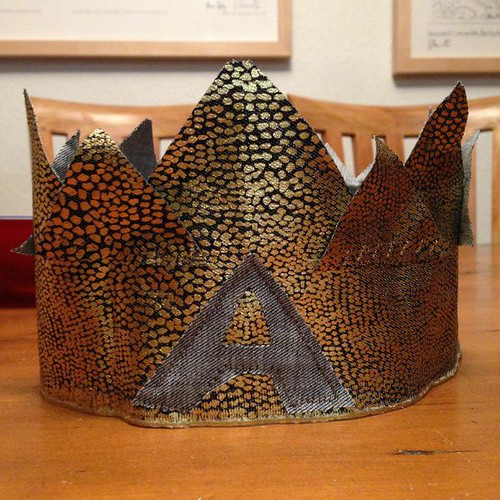
Here are some other ideas I’ve made for the friends of my four-year old—Super Hero shirts (with their first initial) and personalized crowns! Have fun and enjoy!
Love,
Erica

0 comments:
Post a Comment